Good Day, Stampers! Today's share is once again my fav, the Santa image from the Jolly Old Saint Nick stamp set (1211321 clear mount) and a Tutorial showing you how I made some of the elements on the card and the measurements. Today I decided to make a 5" square card. For the Real Red base, you will need your Real Red cardstock to measure 5"x10" and then score at 5" and fold in half with a Bone Folder. I added a piece of Candy Cane Christmas DSP (120809) that measures 4 3/4" square and is wrapped with a Satin Real Red Ribbon (117286) bow. The white cardstock with the Santa image measures 3 1/4" square.
For the focal point, you will need a piece of Real Red cardstock that measures 3 13/16" square, the Scallop Trim Border punch (118402) and the Scallop Trim Corner punch(118870).
You will need to first punch all four corners of the cardstock. Insert a corner into the Scallop Trim Border punch as shown and punch your cardstock. Make sure when you slide the cardstock in, you feel a stopping point in the corner punch as shown.
After you have punch all four corners of the square, this is what your cardstock should look like, as shown below.
Now for the fun part. You will now punch all four sides of the cardstock using the Scallop Border Trim punch. When you look at the punch you will see a guide in the middle of the punch and this guide should line up exactly with your cardstock as shown below.
Once you have the cardstock aligned in the punch exactly over the punch guide, you can then punch your side.
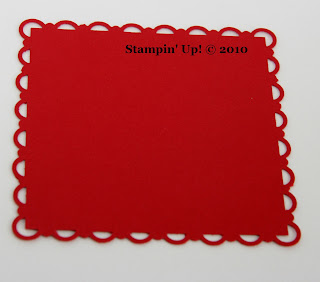
After all four sides are punched this is what your cardstock should look like.
I hope that you have found this tutorial to be helpful to you when using your Scallop Border Trim Punch and your Scallop Corner Trim Punch. All products can be purchased online at my Stampin' Up! website. If you would like a Demonstration of these two punches and learn how to use them to create other shapes and sizes Contact Me on me on my Stampin' Up! website to book your workshop today. Thanks for stopping by and have a Stampin' Good Day!


