Sunday, October 3, 2010

Jolly Old Santa and Tutorial


Good Day, Stampers!  Today's share is once again my fav, the Santa image from the Jolly Old Saint Nick stamp set (1211321 clear mount) and a Tutorial showing you how I made some of the elements on the card and the measurements.  Today I decided to make a 5" square card.  For the Real Red base, you will need your Real Red cardstock to measure 5"x10" and then score at 5" and fold in half with a Bone Folder.  I added a piece of Candy Cane Christmas DSP (120809) that measures 4 3/4" square and is wrapped with a Satin Real Red Ribbon (117286) bow.  The white cardstock with the Santa image measures 3 1/4" square.

For the focal point, you will need a piece of Real Red cardstock that measures 3 13/16" square, the Scallop Trim Border punch (118402) and the Scallop Trim Corner punch(118870)

You will need to first punch all four corners of the cardstock.  Insert a corner into the Scallop Trim Border punch as shown and punch your cardstock.  Make sure when you slide the cardstock in, you feel a stopping point in the corner punch as shown.


 After you have punch all four corners of the square, this is what your cardstock should look like, as shown below.

Now for the fun part.  You will now punch all four sides of the cardstock using the Scallop Border Trim punch.  When you look at the punch you will see a guide in the middle of the punch and this guide should line up exactly with your cardstock as shown below.

 Once you have the cardstock aligned in the punch exactly over the punch guide, you can then punch your side.


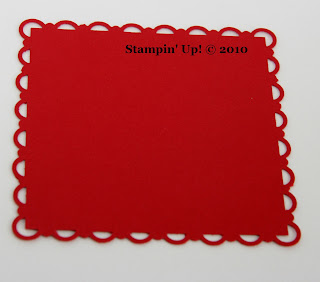
After all four sides are punched this is what your cardstock should look like.


I hope that you have found this tutorial to be helpful to you when using your Scallop Border Trim Punch and your Scallop Corner Trim Punch.  All products can be purchased online at my Stampin' Up! website.  If you would like a Demonstration of these two punches and learn how to use them to create other shapes and sizes Contact Me on me on my Stampin' Up! website to book your workshop today.  Thanks for stopping by and have a Stampin' Good Day!

Saturday, October 2, 2010

World Card Making Day 2010 number 2


Hey Stampers,

It's still World Card Making Day and I have been busy today in my studio.  Here is another card using the Santa image from the Jolly Old Saint Nick stamp set.  This is one stamp set that should be on every one's "To Buy List" for the Holiday season.  Hopefully I'll get around to using the other 5 images in the set, but right now I am stuck on Santa.

In this card I used the Jolly Holiday Designer Series Paper for my focal point on the base of Real Red cardstock and I also paper pieced the same DSP on Santa's Hat.  Cherry Cobbler is the color of the red dots on the DSP but the dots are so small that you can't tell if its Real Red or Cherry Cobbler, so I chose to use Real Red for my card base and the scallop rectangle (nestabilities) .  I also used a 2-Way Glue Pen and Dazzling Diamonds on the brim and ball of the Santa hat. To finish off the card I tied a bow using Real Red Satin Ribbon and an Old Olive button and some ivory colored thread.  To color Santa's face I used a Copic marker, E25 Caribe Cocoa.

I hope you enjoy this card as much as I did making it and I hope I have inspired someone today.  Thanks for stopping by!

Splitcoaststampers Challenge 300 (SC300) Jolly Old Saint Nick


Isn't He Fabulous!?!  I just love this Santa image from the Jolly Old Saint Nick stamp set from Stampin' Up!  This is a six image stamp set that is in Stampin' Up! 2010 Holiday Mini Catalog.  If you would like to order this stamp set, please click HERE and order anytime from my website. 

To dress Him up a bit, I used a 2-Way Glue Pen and then applied some Dazzling Diamonds to make Santa sparkle.  Also used the Designer Series Paper, Candy Cane Christmas which is also featured in the 2010 Holiday Mini Catalog as well as the Northern Frost Decorative Sizzlet Strip to create the cute little Baha Blue snowflake.  I stamped the Merry Christmas image from the Delightful Decorations stamp set, punched it out with our 3/4" Circle Punch and used Dimensionals to adhere the snowflake to the card.  To trim out the card I used Real Red cardstock.

To color my image I used a Copic marker (E25 Caribe Cocoa) on Santa's face and Copic marker R29 (Lipstick Red) on Santa's hat.  Yes, I know that these are not Stampin' Up! products, but in my defense, Stampin' Up! does not make a skin tone marker  that represents my skin tone, so I turned to Copic.

This card is also my submission on Splitcoaststampers for this week's sketch challenge, SC300.  If you want to play along go to www.splitcoaststampers.com and submit your card.

If you would like to make this card yourself, contact me and book a Workshop.  Thanks for stopping by, have a Stampin' Good Day and Happy World Card Making Day.